SAXS Tab
This tab is most suitable for samples that are of large quantities and are not prone to radiation damage. Generally, the samples are mounted on a holder that is affixed to the sample stage that can move horizontally (perpendicular to the x-ray beam) and vertically.
Once the samples are mounted, the user will decide which part of each sample will be exposed to the x-ray beam. To do that, the user needs to insert the sample scope (1) so that he or she can see the sample. The center of the cross in the video image is where the x-ray beam is at the specific sample stage position. To move the sample to the center of the cross, the user can ctrl+click on the image (the point of click will be moved to the center of the cross if the calibration is correct), or type in the positions for the motors in the sample stage montor control panel (4) below the image and then click on the "Move" button. For minor sample position movement, the user can click on the arrows that are next to the motors. If the user is satisfied with the sample position, he or she then clicks on the "Accept" button (4), and the motor positions will be inserted into the sampe parameters panel (3). The user may want to complete the sample entry in the sample parameters panel by specifying the exposure time for each image, # of exposures, wait time betweem exposures, whether the sample is a protein sample (S) or buffer (B), and finally the file name root for the images.
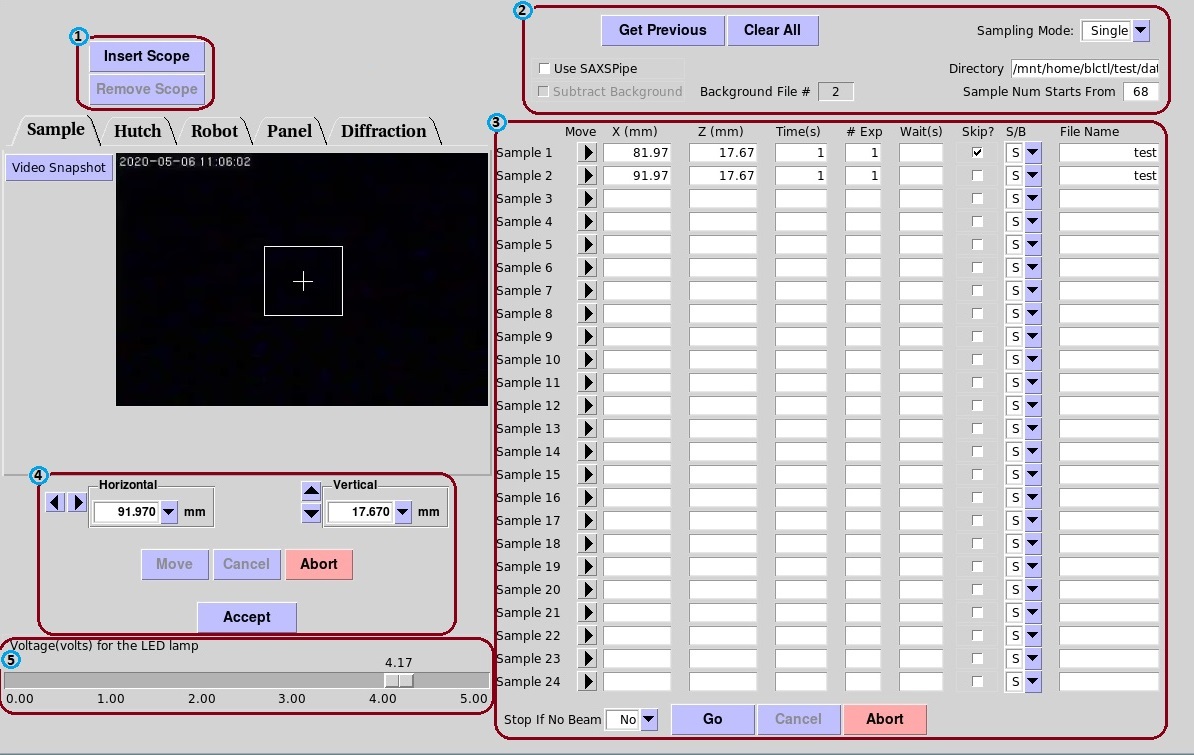
The user can use the sample parameters that was last used for data acquisition by clicking on the "Get Previous" button in the run setup panel (2), or he or she can remove all the inputs in the sample parameters panel (3) by clicking on the "Clear All" button (2).
In the run setup panel (2), the user spcifies the directory the image files will be saved to, whether to stop collecting data when x-ray beam is lost, what number to start for file naming purposes, and whether to run SAXSPipe and how to run (for background subtraction) SAXSPipe after each sample is measured.
While setting up sample points, sample lighting can be adjusted throught the slider at the bottom of the left side (5).
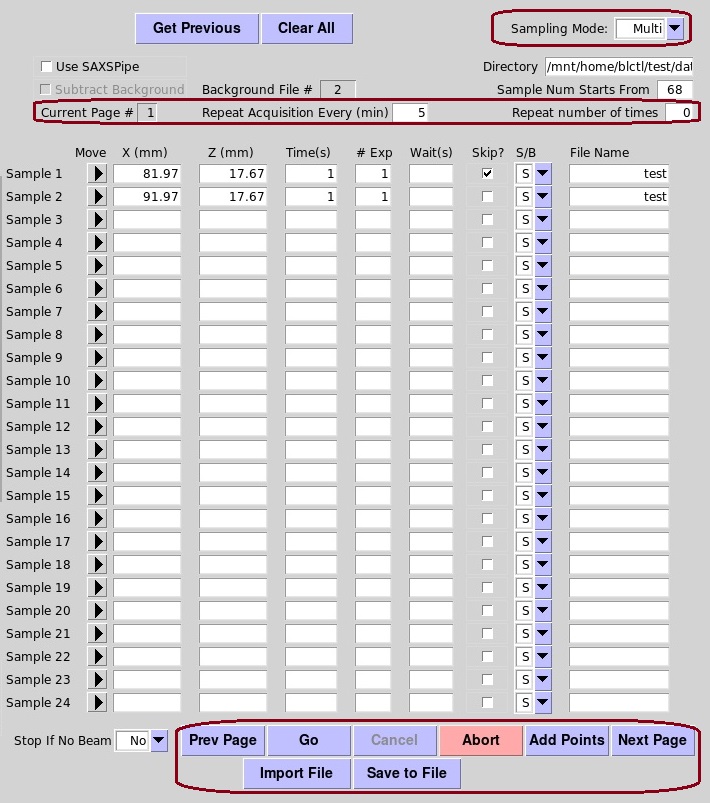
There are two Sampling Modes: Multi and Single (2). The above image is for the "Single" mode, and the "Multi" mode is shown in the image below. The "Single" mode is used when there are 24 or less sample points and there is no repeat measurement. The user sets the parameters for all the sample points and then click "Go" to start the exposure. "Multi" is used when there are more than 24 sample points or when repeated measurements are desired. The user can set how frequently to repeat the exposure, and for how many repeats. When the first 24 samples are set, the user click on the "Add Points" button in the bottom of the sample parameters panel, a new sample parameters panel will appear to allow another 24 samples. The user can have a total of 8X24 sample points in the "Multi" mode. The user can also save the parameters to a file, or import parameters from a file.