Remote Access
[Notice!] Prior setup of SSH keys is required for this remote access configuration. See "SSH Key Setup" page.
Overview
Remote Access allows users to perform experiments on BioSAXS beamline and run processing software on the beamline computers from remote locations anywhere in the world. Remote Access is accomplished by using an NX Client/Server Remote Unix Desktop application. Users Download and install a free NX Client on their computer and connect to a NX Server running at SSRL. Once the NX Client is configured, all command line and X-Window based applications on the BL4-2 beamline are available through the Remote NXClient Desktop. The server performs the bulk of the computational work and the client requires only minimal CPU, memory and bandwidth.
The software is a product of NoMachine. Clients for the NoMachine software are available for Linux, Windows and Mac OS X. There are also versions available for iOS and Android tablets.
[New] Experimental data should be stored in the directory under "/mnt/data_c60/b_[last name]" or "/data/b_[last name]".
Host Server Address
SSRL BL4-2 Remote Access Server:
- bl42nxs1.slac.stanford.edu
The server is currently running NoMachine's Terminal Server Version 8.16.1 and the operating system is Debian 12.
Downloading and Installing the NX Client
There are several server and client products offered by NoMachine. For the NX Client there are two packages to choose from:
- NoMachine's Enterprise Client (NX Client - preferred) - Download
- NoMachine's Free Personal Edition (Includes NX Client and a single server) - Download from NoMachine's Home Page. Be aware that a network facing server is being installed if you use the "Personal Server" option. It is possible to turn off the server after it's been installed, as shown in the NoMachine Support article
Follow the download and installation instructions for your particular operating system.
Linux packages are available in "rpm" format for RedHat/Fedora and in "deb" format for Debian/Ubuntu. A tar.gz package is also available for a manual install.
Starting the NX Client
-
For Windows, double click on the "NoMachine Enterprise Client" shortcut on the desktop or use the windows search box
-
For Mac OS X, click on "NoMachine" in the applications folder
-
For Linux, the program will appear in Menus or Launchers as "NoMachine Player". The command line executable is nxplayer, however the default installation does not add it to PATH (% /usr/NX/bin/nxplayer).
See below for the basic configuration. For full documentation of the NoMachine software, please consult the NoMachine Support Documentation pages.
Welcome Page
-
The first time the software is run, a welcome page is displayed
-
Click "Continue"
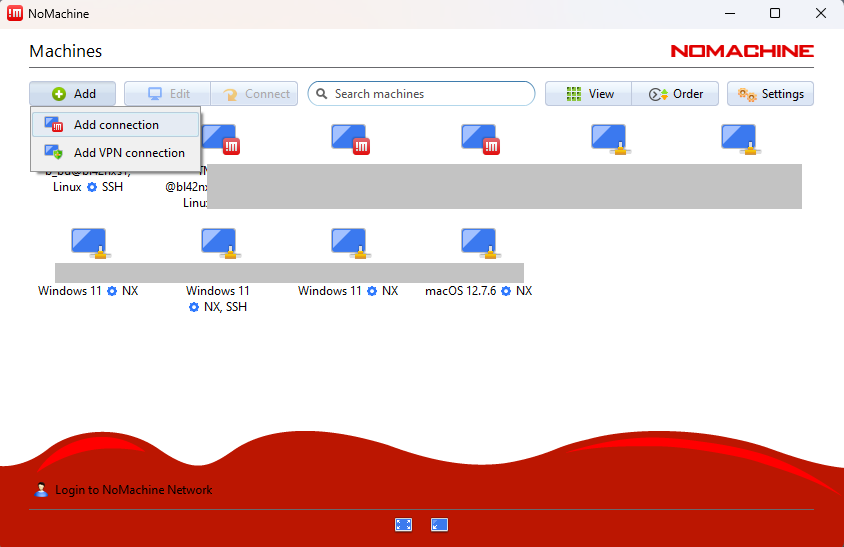
Recent and New Connections Screen
-
The next screen displays a list of configured connections. If this is the first time running the software, it will be empty
-
If a previous version of the NX Client had been installed, there may be recent connections showing up here.
-
Select "Add" and then click on "Add connection"
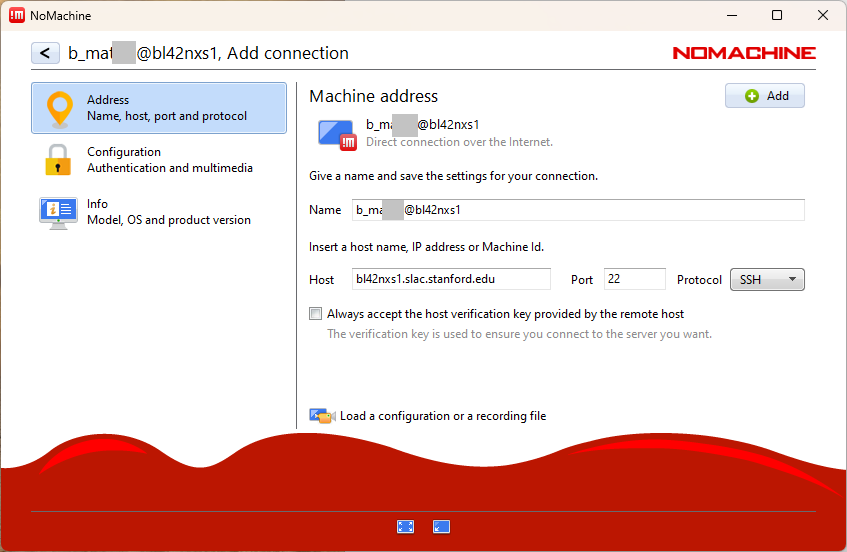
Configure New Connection Protocol
-
The next screen starts a dialog for a new connection
-
Enter the host name and select the "SSH" protocol
-
Click "Configuration"
Configure the authentication
-
On the "Configuration" screen, select the "Use key-based authentication with a key you provide"
-
Click "Modify" next the selection
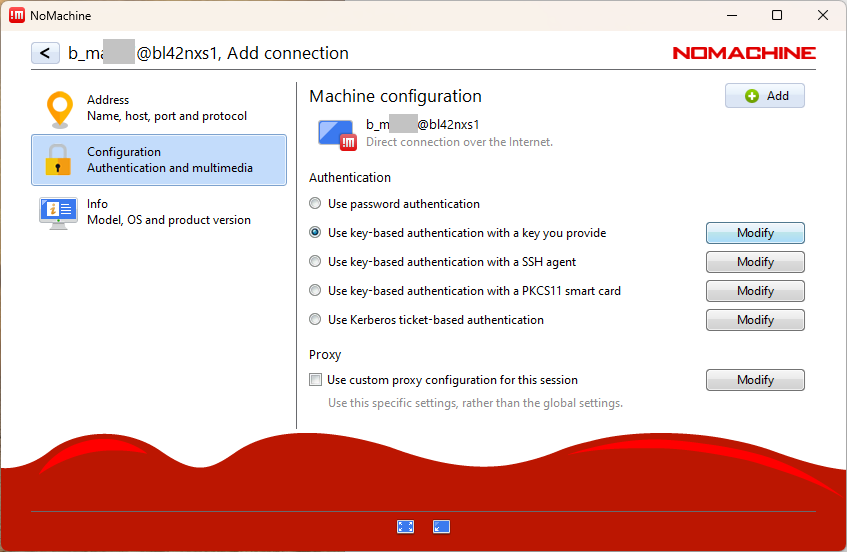
-
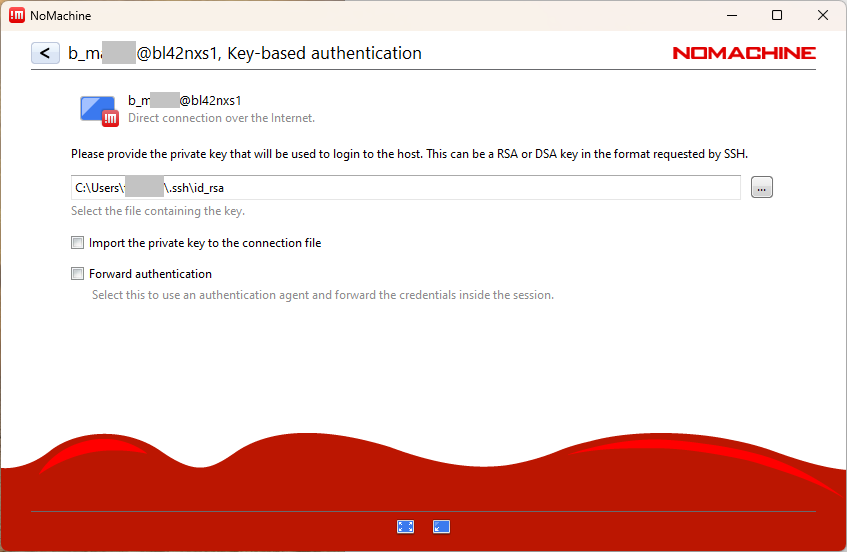
On the next screen, provide the RSA Key of your computer
-
Go back to previous screen. Click "<"
Starting Page
-
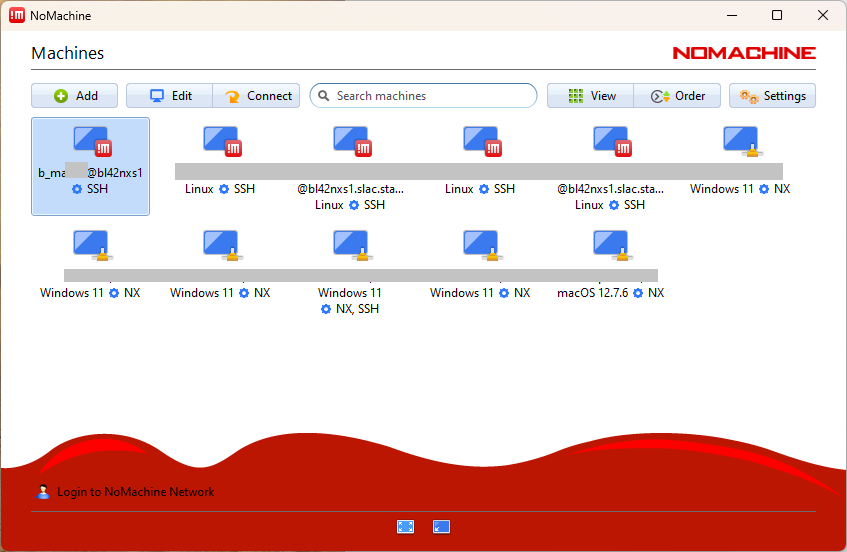
You can now see a new connection on your screen that displays a list of existing computers.
-
Select the connection and then click "Connect". or double-click the connection
BL4-2 Account Login
-
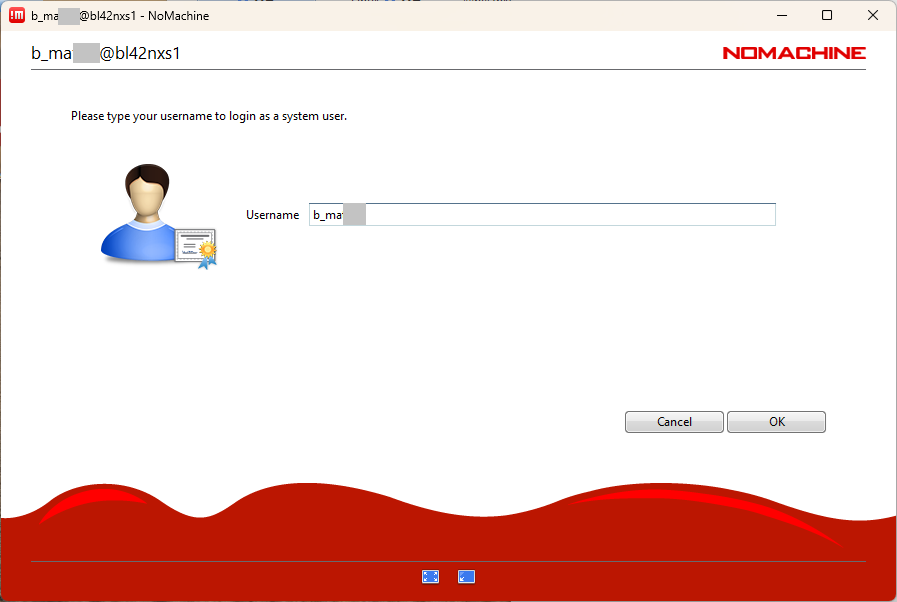
On the next screen, fill in your bl4-2 account username (b_[last name])
-
Click "OK"
Recent and New Sessions Screen
-
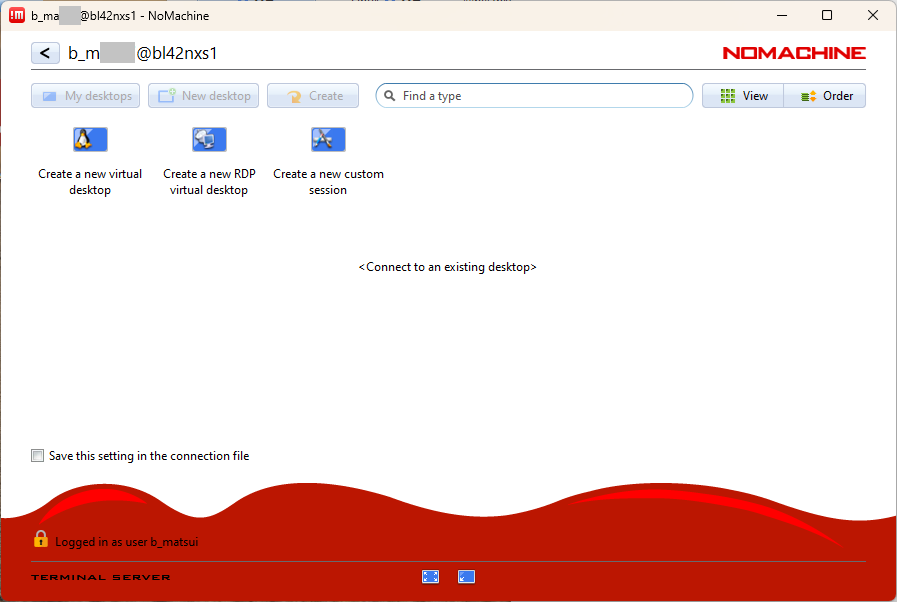
Once logged in, the default session screen lists of all the existing sessions. Select "New desktop"
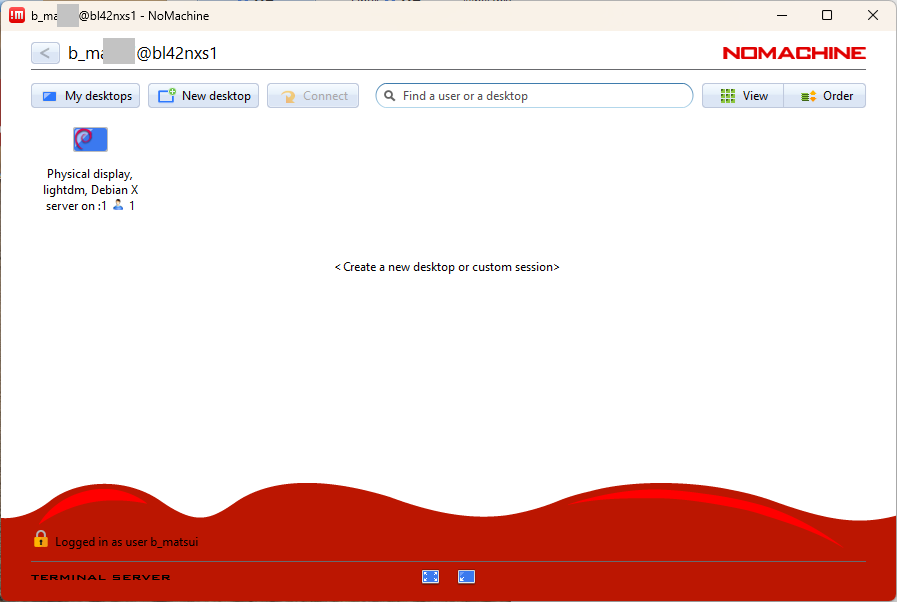
On the next screen, select the "Create a new virtual desktop"
Customization Information
-
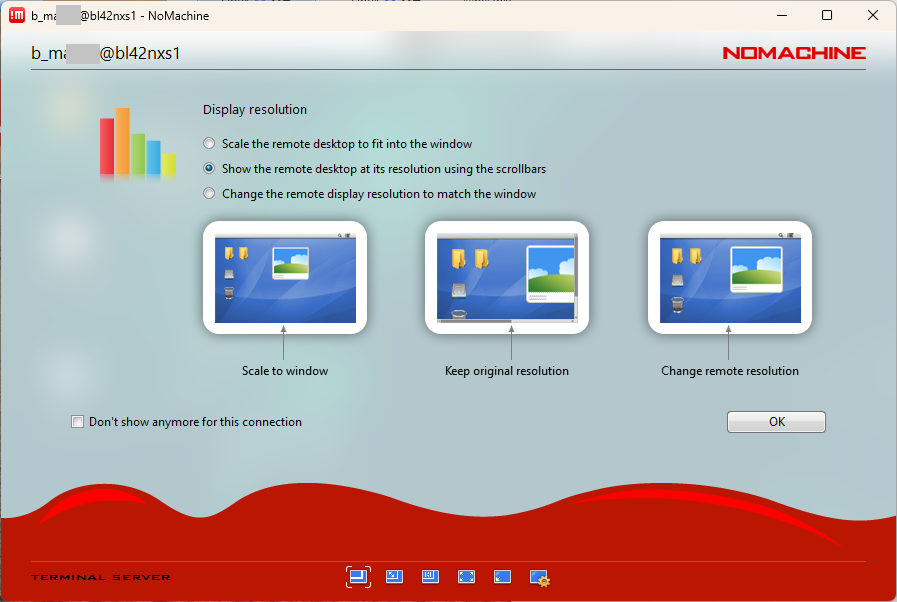
A series of screens with useful information on how to customize the session will be presented while the session is starting up in the background
-
These screens can be disabled by checking the "Don't Show This Message Again" box
The Remote Desktop
-
The remote desktop will now be displayed
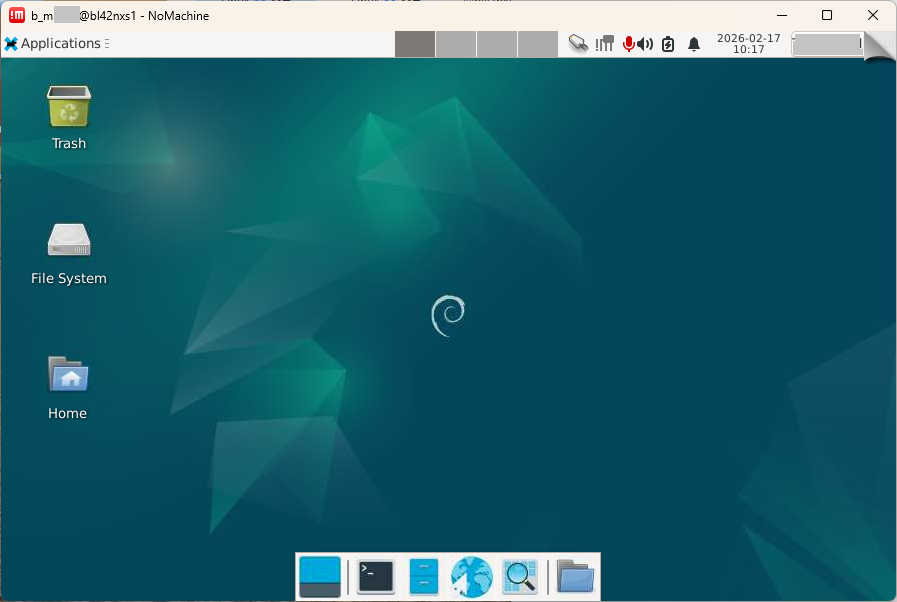
- Note: your experimental data is stored in "/mnt/data_c60/b_[last name]" or "/data/b_[last name]". It is not under the home directory.
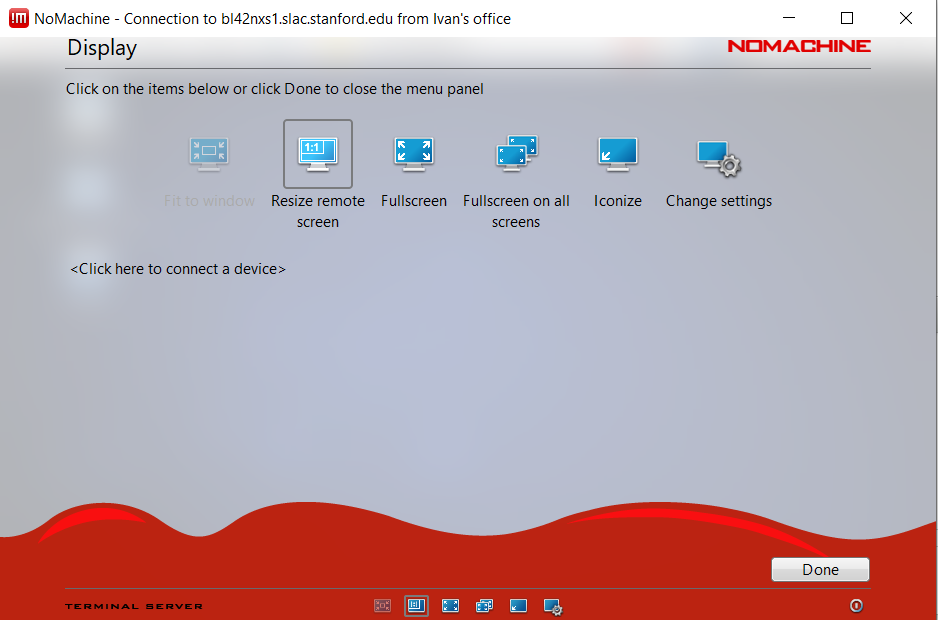
Customizing the Desktop Display
- There are many customization options available that can be accessed in the menu panel by moving the mouse to the upper right corner of the virtual desktop (see the previous screenshot) and clicking inside the peel-down or by typing Ctrl+Alt+0
- For example you can match the virtual screen resolution to the local screen resolution, by selecting "Resize Remote Screen"
- Click "Done"